Latest Updates
How to Set Up Cron Job in WHMCS
How to Set Up Cron Job in WHMCS WHMCS is designed to automate many of the day-to-day tasks involved in managing a hosting business. From generating invoices and processing payments to sending renewal reminders…
How to Set Up Cron Job in WHMCS
WHMCS is designed to automate many of the day-to-day tasks involved in managing a hosting business. From generating invoices and processing payments to sending renewal reminders and managing hosting accounts, automation plays a critical role in ensuring smooth operations. At the heart of this automation system is the WHMCS cron job.
A cron job is a scheduled task that runs automatically on your server at specific intervals. WHMCS uses cron jobs to execute various automated functions that would otherwise require manual administration. Without a properly configured cron job, important processes such as invoice creation, payment reminders, service suspension, and domain synchronization may not work correctly.
This guide explains how to set up Cron Job in WHMCS and ensure that your automation system runs efficiently.
What is a Cron Job?
A cron job is a Linux-based scheduling utility that executes commands or scripts automatically at predefined times. WHMCS relies on cron jobs to perform routine maintenance and automation tasks throughout the day.
Some of the most common tasks handled by the WHMCS cron job include:
- Invoice generation
- Payment processing
- Service provisioning
- Service suspension and unsuspension
- Service termination
- Domain renewal reminders
- Domain synchronization
- Currency exchange rate updates
- Automated reports
- Database maintenance
- Support ticket escalations
The cron job acts as the automation engine that keeps your WHMCS installation functioning without constant manual intervention.
Why Configure a Cron Job in WHMCS?
Understanding How to Set Up Cron Job in WHMCS is essential for ensuring that all automation features work correctly. A properly configured cron job allows WHMCS to generate invoices, process payments, manage services, and send important notifications automatically. Learning How to Set Up Cron Job in WHMCS can save administrators significant time while improving operational efficiency.
- Automated Billing
- Timely Payment Reminders
- Automatic Service Management
- Domain Automation
- Reduced Administrative Work
- Improved Customer Experience
Prerequisites
Before configuring the cron job, ensure the following requirements are met:
- WHMCS is installed correctly.
- You have access to your hosting control panel.
- PHP CLI is available on the server.
- The WHMCS crons directory exists.
- Proper file and folder permissions are configured.
- Your server meets WHMCS system requirements.
Steps to How to Set Up Cron Job in WHMCS
Step 1: Log in to Your Hosting Control Panel
Begin by logging into your hosting control panel.
Common control panels include:
- cPanel
- DirectAdmin
- Plesk
- Webmin
Most shared hosting providers offer cPanel, while VPS and dedicated servers may use other control panels.
After logging in, locate the server management section where scheduled tasks can be configured.

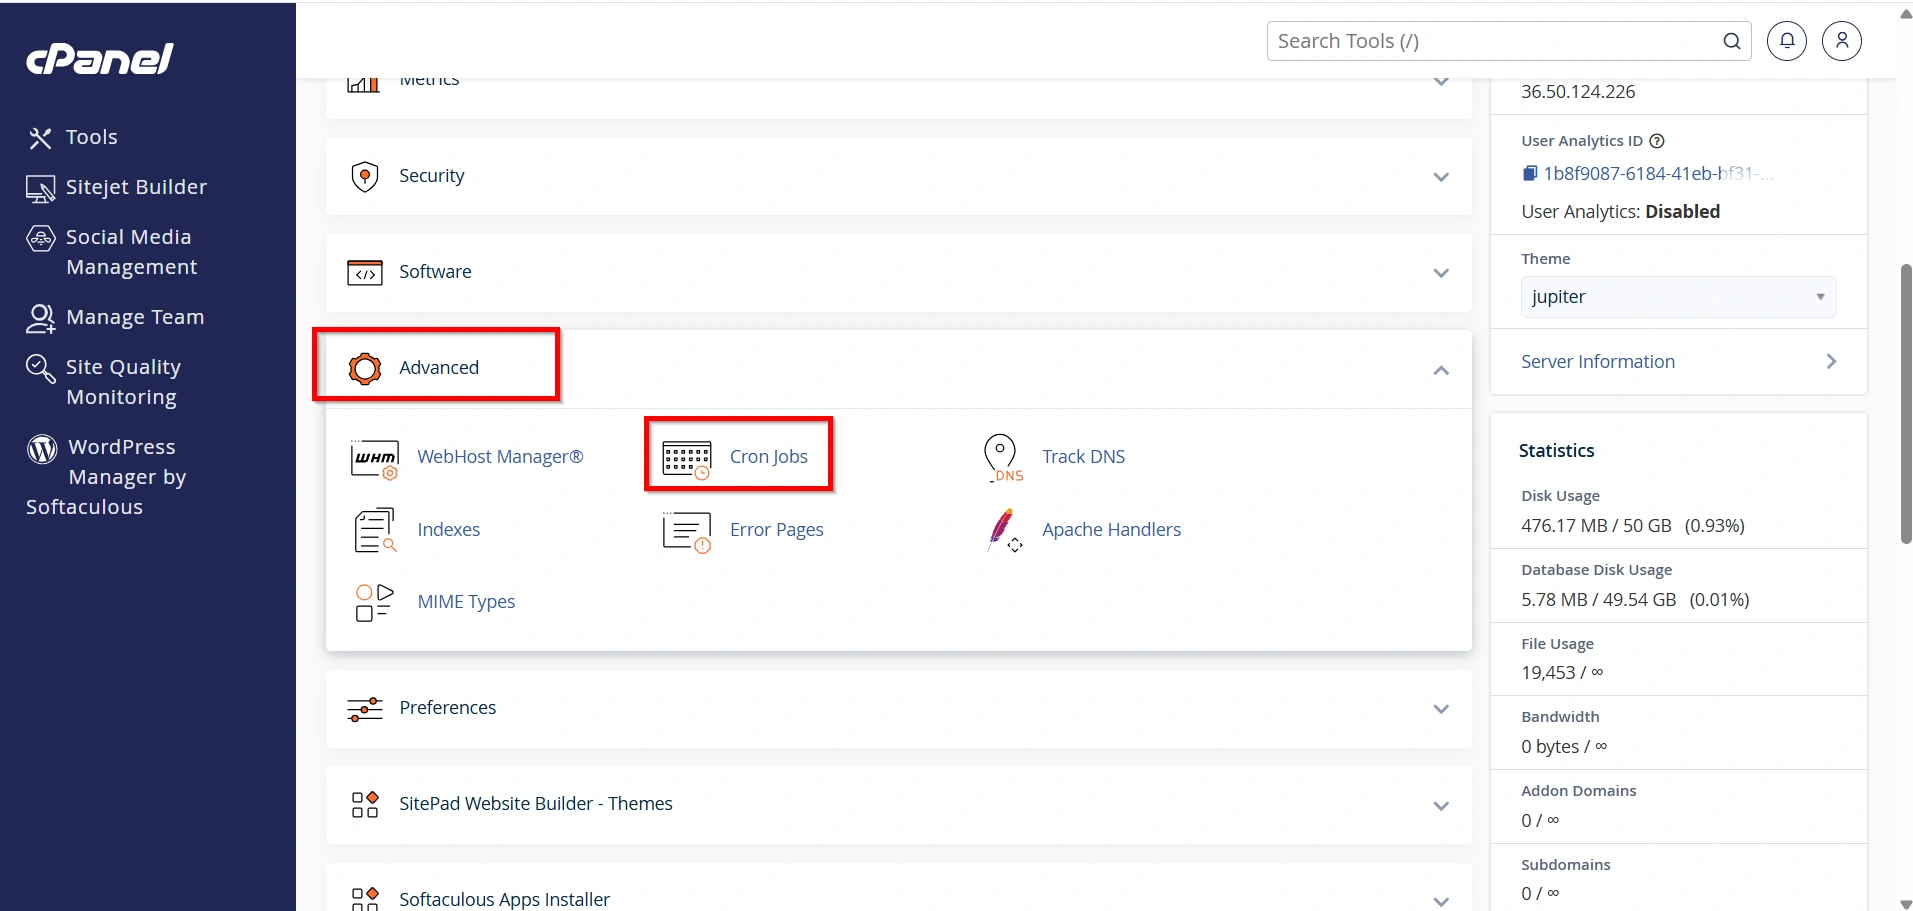
Step 2: Open the Cron Jobs Section
In cPanel, scroll to the Advanced section.
Click on Cron Jobs.
This area allows you to create automated tasks that run on a predefined schedule.
If you are using another control panel, the location may vary slightly, but the process remains similar.
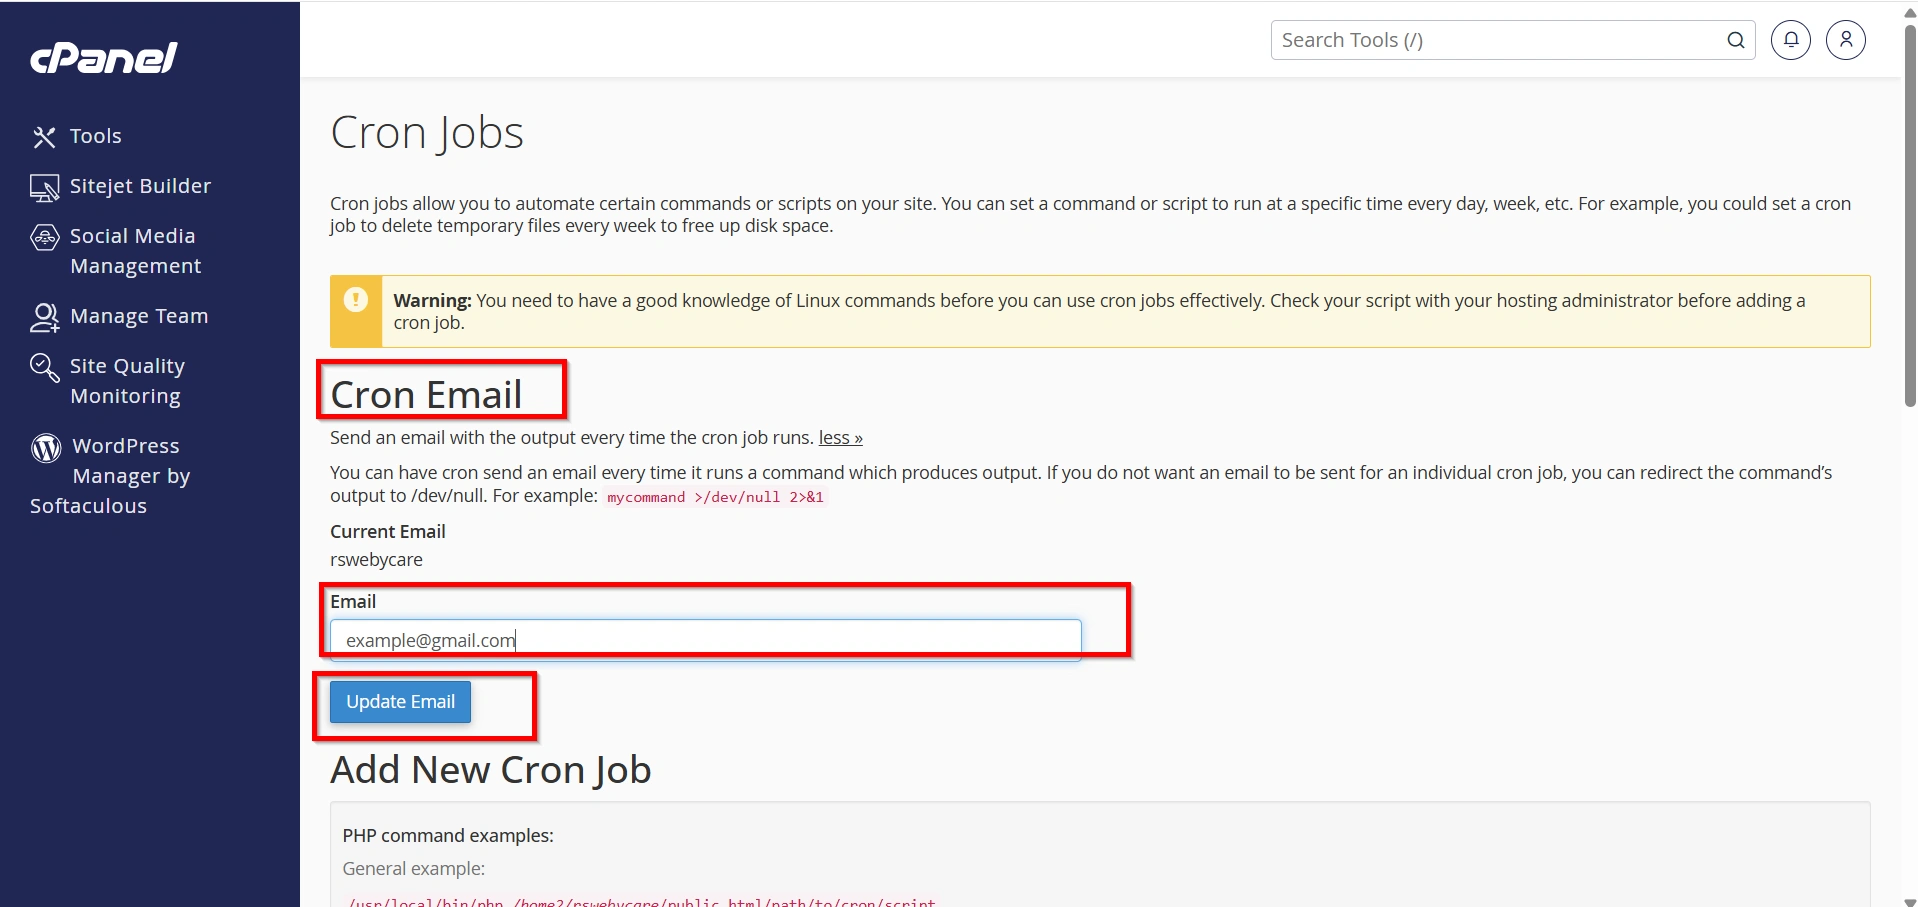
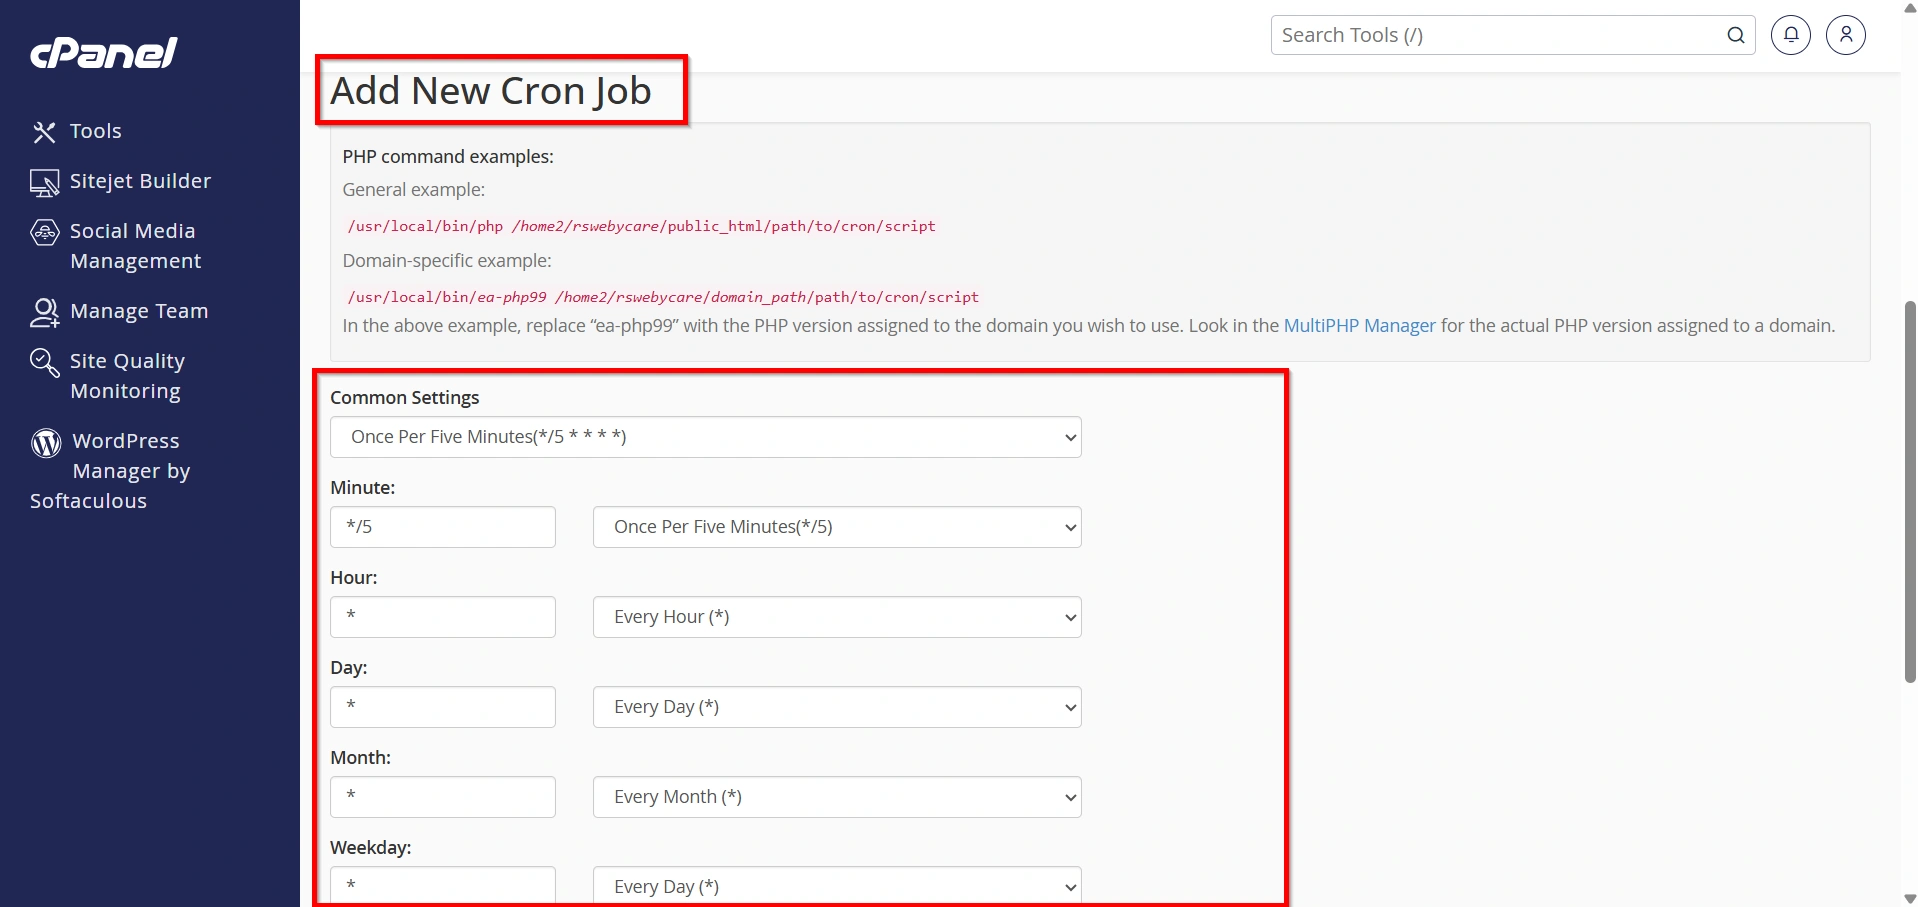
Step 3: Create a New Cron Job
If this is your first cron job, cPanel may ask you to provide an email address for receiving cron notifications.
Enter your preferred email address and click Update Email.
Next, create a new cron job schedule.
WHMCS recommends running the cron every five minutes.
Enter the following schedule:
*/5 * * * *
This schedule instructs the server to execute the WHMCS automation script every five minutes.
Running the cron every five minutes ensures that all scheduled tasks are processed promptly and reliably.
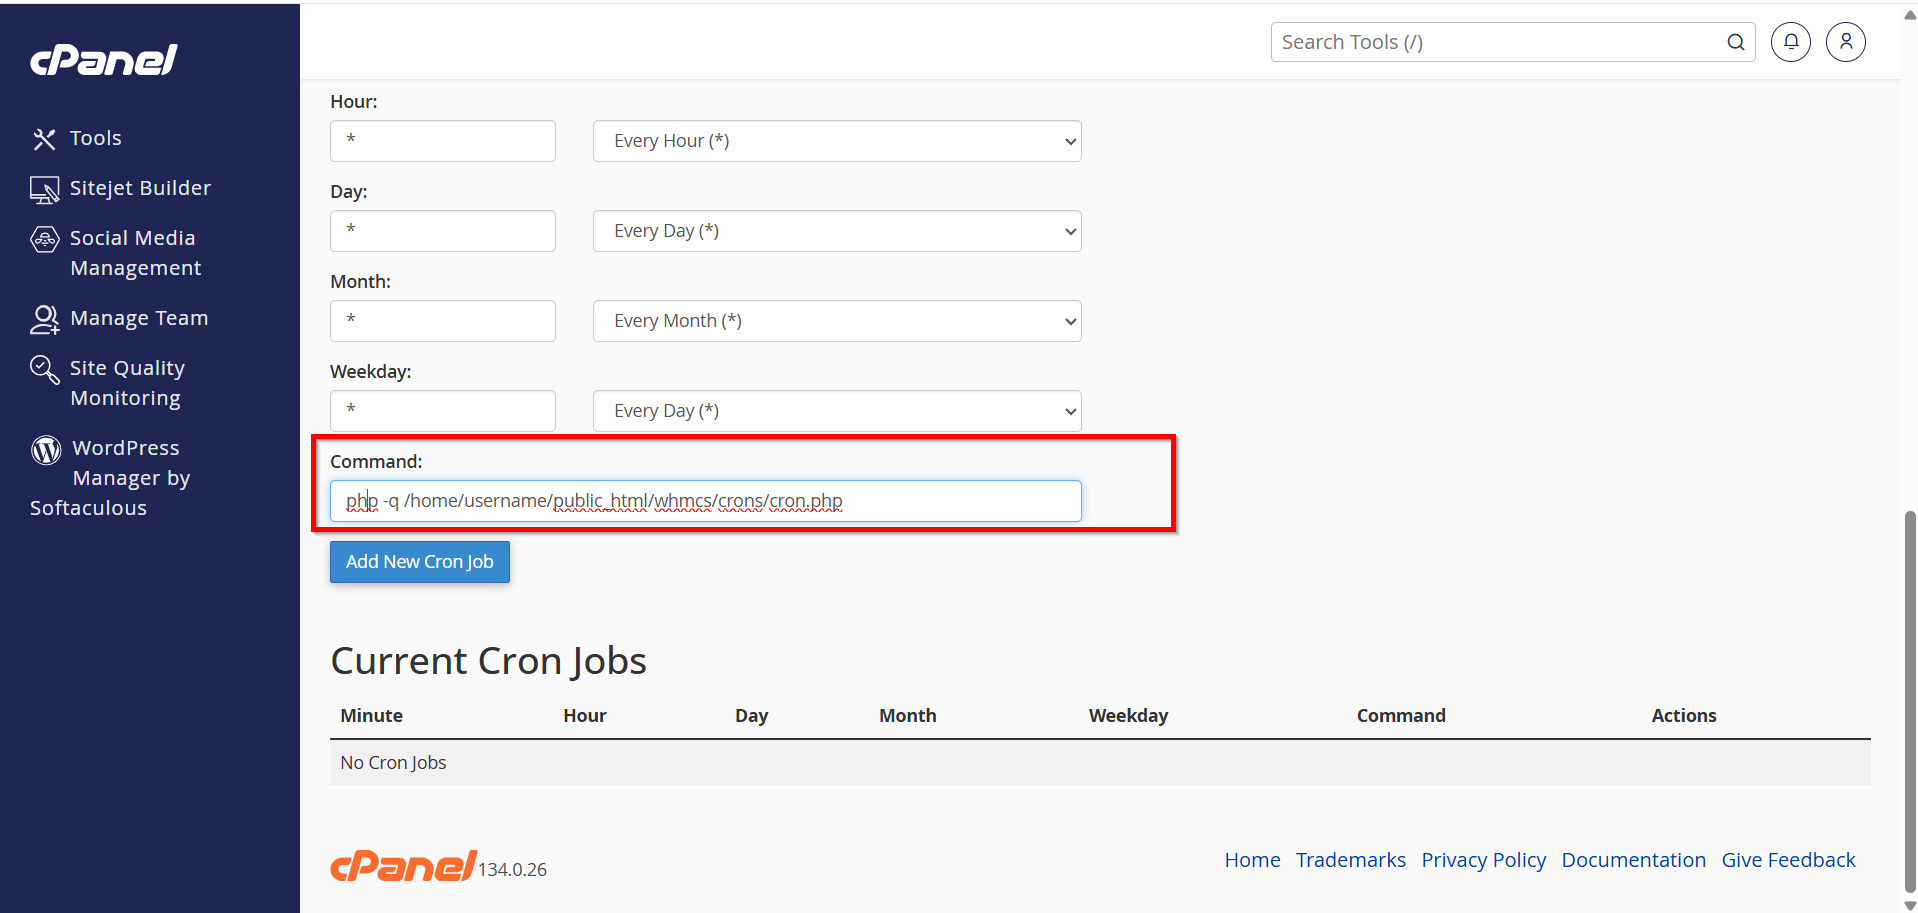
Step 4: Enter the WHMCS Cron Command
In the Command field, enter the WHMCS cron command.
Example:
php -q /home/username/public_html/whmcs/crons/cron.php
Replace:
/home/username/public_html/whmcs/
with the actual path to your WHMCS installation.
You can find the recommended cron command by logging into your WHMCS Admin Area and navigating to:
System Settings → Automation Settings
WHMCS will display the exact command required for your installation.
Entering the correct command is extremely important because an incorrect path will prevent automation tasks from running successfully.
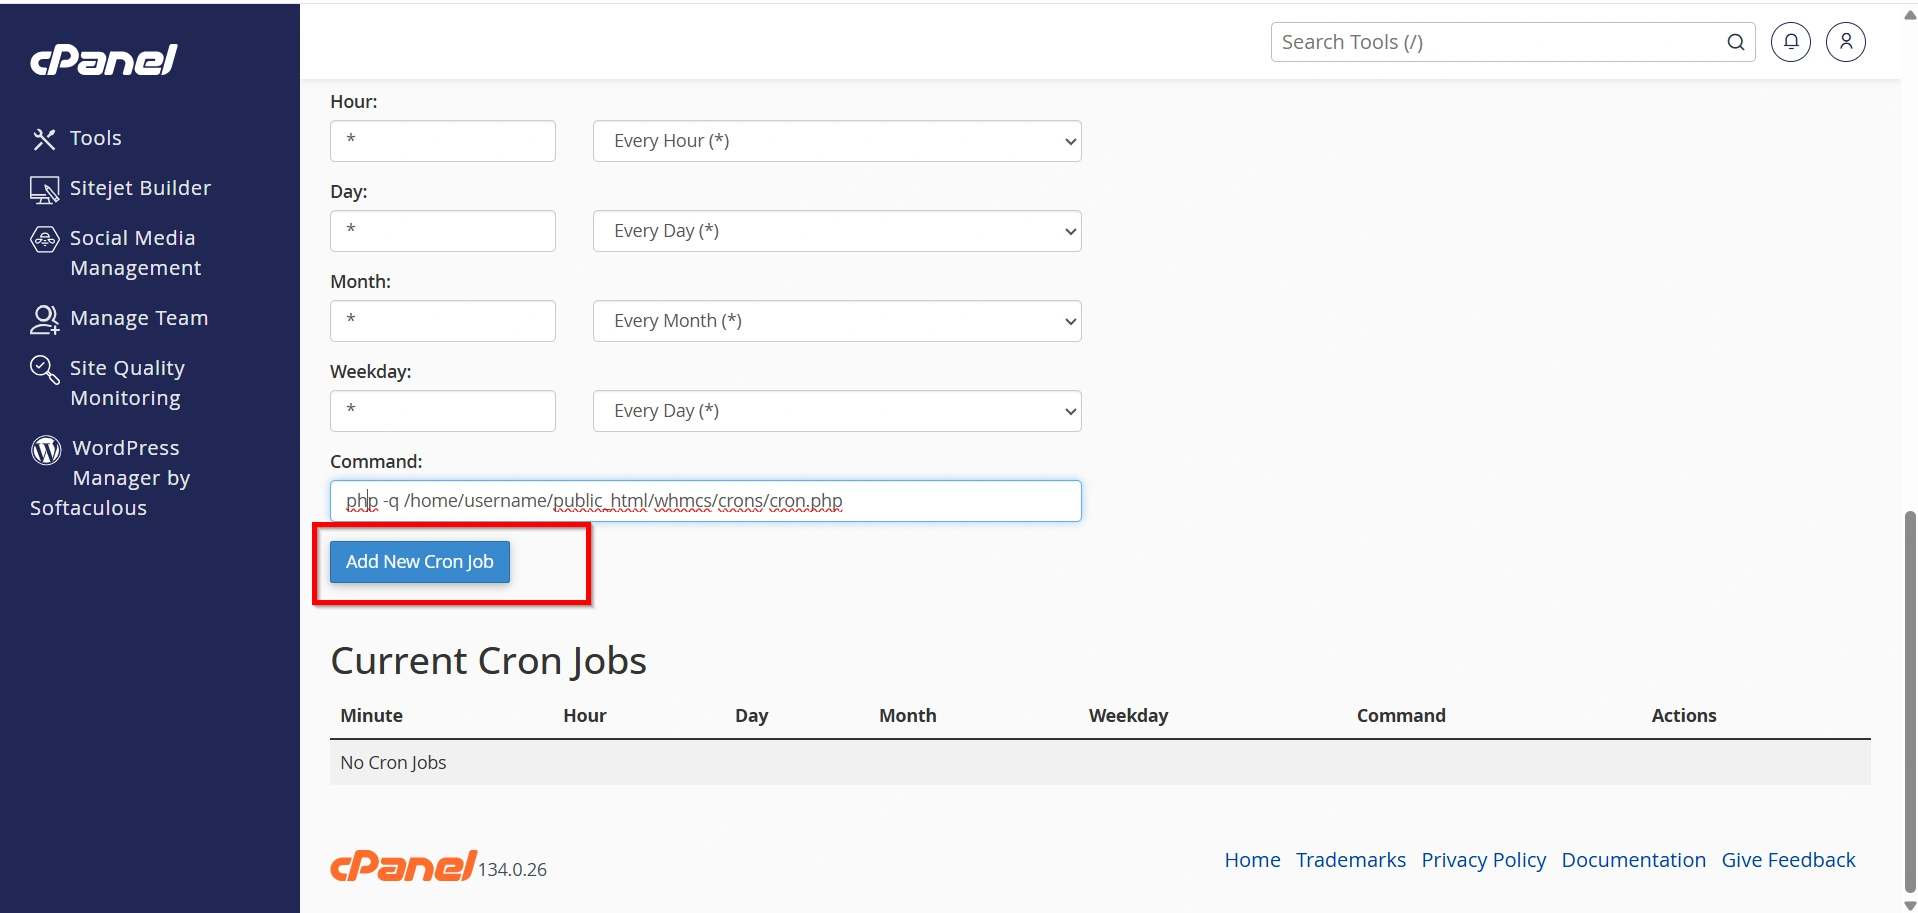
Step 5: Save the Cron Job
After entering the schedule and command, click:
Add New Cron Job
The cron job will immediately be added to the server schedule.
Once saved, your server will automatically execute the WHMCS automation script every five minutes according to the schedule you configured.
Verifying the Cron Job
After completing the configuration process, it is important to verify that How to Set Up Cron Job in WHMCS has been implemented successfully. Check the automation status within WHMCS and confirm that the Last Cron Run timestamp is updating regularly.
Log in to your WHMCS Admin Area and navigate to:
System Health and Updates → System Health Status
Review the following information:
- Cron Status
- Last Cron Run
- Automation Status
If everything is configured correctly, WHMCS will display the latest successful cron execution time.
You should see recent timestamps indicating that the cron is running normally.
Common Tasks Performed by the WHMCS Cron
Once configured, the cron job performs a wide range of automation tasks.
- Invoice Generation
- Payment Processing
- Service Suspension
- Service Reactivation
- Domain Management
- Automated Notifications
- Database Maintenance
Best Practices for WHMCS Cron Jobs
Once you Set Up Cron Job in WHMCS, regularly monitor automation logs, review billing tasks, and ensure that domain synchronization processes are running correctly. Proper maintenance helps prevent automation failures and improves overall platform reliability.
- Keep WHMCS updated.
- Monitor automation logs regularly.
- Verify cron execution after server migrations.
- Use the cron command recommended by WHMCS.
- Secure your WHMCS installation with proper permissions.
- Review automation settings periodically.
Following these best practices helps maintain consistent performance and reduces the likelihood of automation failures.
Conclusion
Knowing How to Set Up Cron Job in WHMCS is an important part of maintaining a successful WHMCS installation. By following the steps outlined in this guide, you can confidently Set Up Cron Job in WHMCS and ensure that billing, invoicing, payment processing, service management, and domain automation operate smoothly. Properly understanding How to Set Up Cron Job in WHMCS helps reduce manual work, improve efficiency, and deliver a better experience for your customers.
Originally published on WebyStrata.com Blog.
Related Articles