Latest Updates
How To Fix WordPress Plugin Errors
How To Fix WordPress Plugin Errors? WordPress plugins are essential tools that extend the functionality of your website. Whether you're using plugins for contact forms, SEO, security, backups, or page building, they play a…
How To Fix WordPress Plugin Errors?
WordPress plugins are essential tools that extend the functionality of your website. Whether you’re using plugins for contact forms, SEO, security, backups, or page building, they play a significant role in enhancing your site’s capabilities. However, plugin-related issues can occasionally occur and cause features to stop working, generate error messages, or even affect the overall performance of your website.
Fortunately, many plugin-related issues can be resolved without advanced technical knowledge. One of the easiest and most effective troubleshooting techniques is to deactivate and reactivate the problematic plugin. This simple process refreshes the plugin’s functionality and can often eliminate temporary issues that may have developed over time.
In this guide, you’ll learn how to Fix WordPress Plugin Errors using the deactivate and reactivate method.
Why Do WordPress Plugin Errors Occur?
Plugin errors can occur for several reasons, including:
- Temporary plugin configuration issues
- Incomplete plugin updates
- Minor conflicts with WordPress core files
- Plugin cache-related problems
- Corrupted temporary data
- Resource loading failures
- Unexpected server interruptions
In many cases, these issues do not require a complete plugin reinstallation. Instead, you can often Fix WordPress Plugin Errors by simply refreshing the plugin through deactivation and reactivation.
Deactivate and Reactivate the Plugin
Deactivating and reactivating a plugin forces WordPress to reload the plugin files and settings. This process can resolve many common issues without affecting your website content.
Step 1: Log in to Your WordPress Dashboard
Open your preferred web browser and access the WordPress administration area.
Typically, the login URL will look like:
https://yourdomain.com/wp-admin
Enter your administrator username and password, then click Log In.
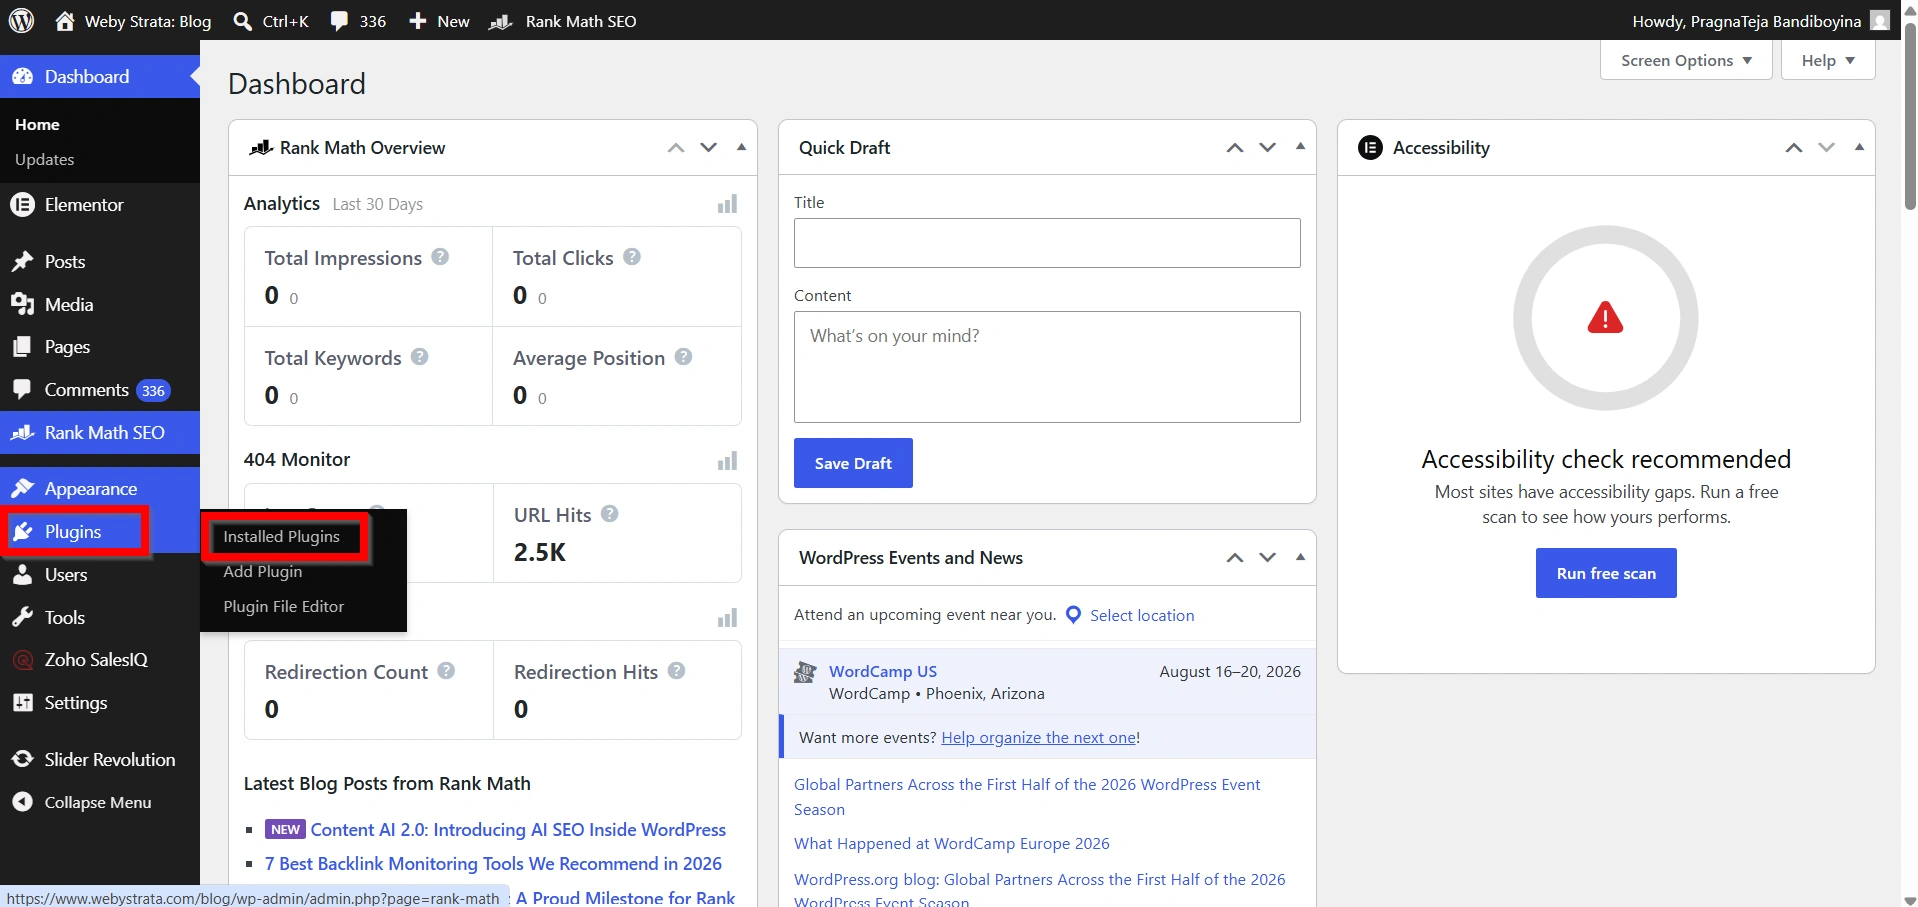
Step 2: Navigate to Installed Plugins
After logging in successfully:
- Locate the left-hand navigation menu.
- Click Plugins.
- Select Installed Plugins.
You will now see a complete list of plugins installed on your WordPress website.
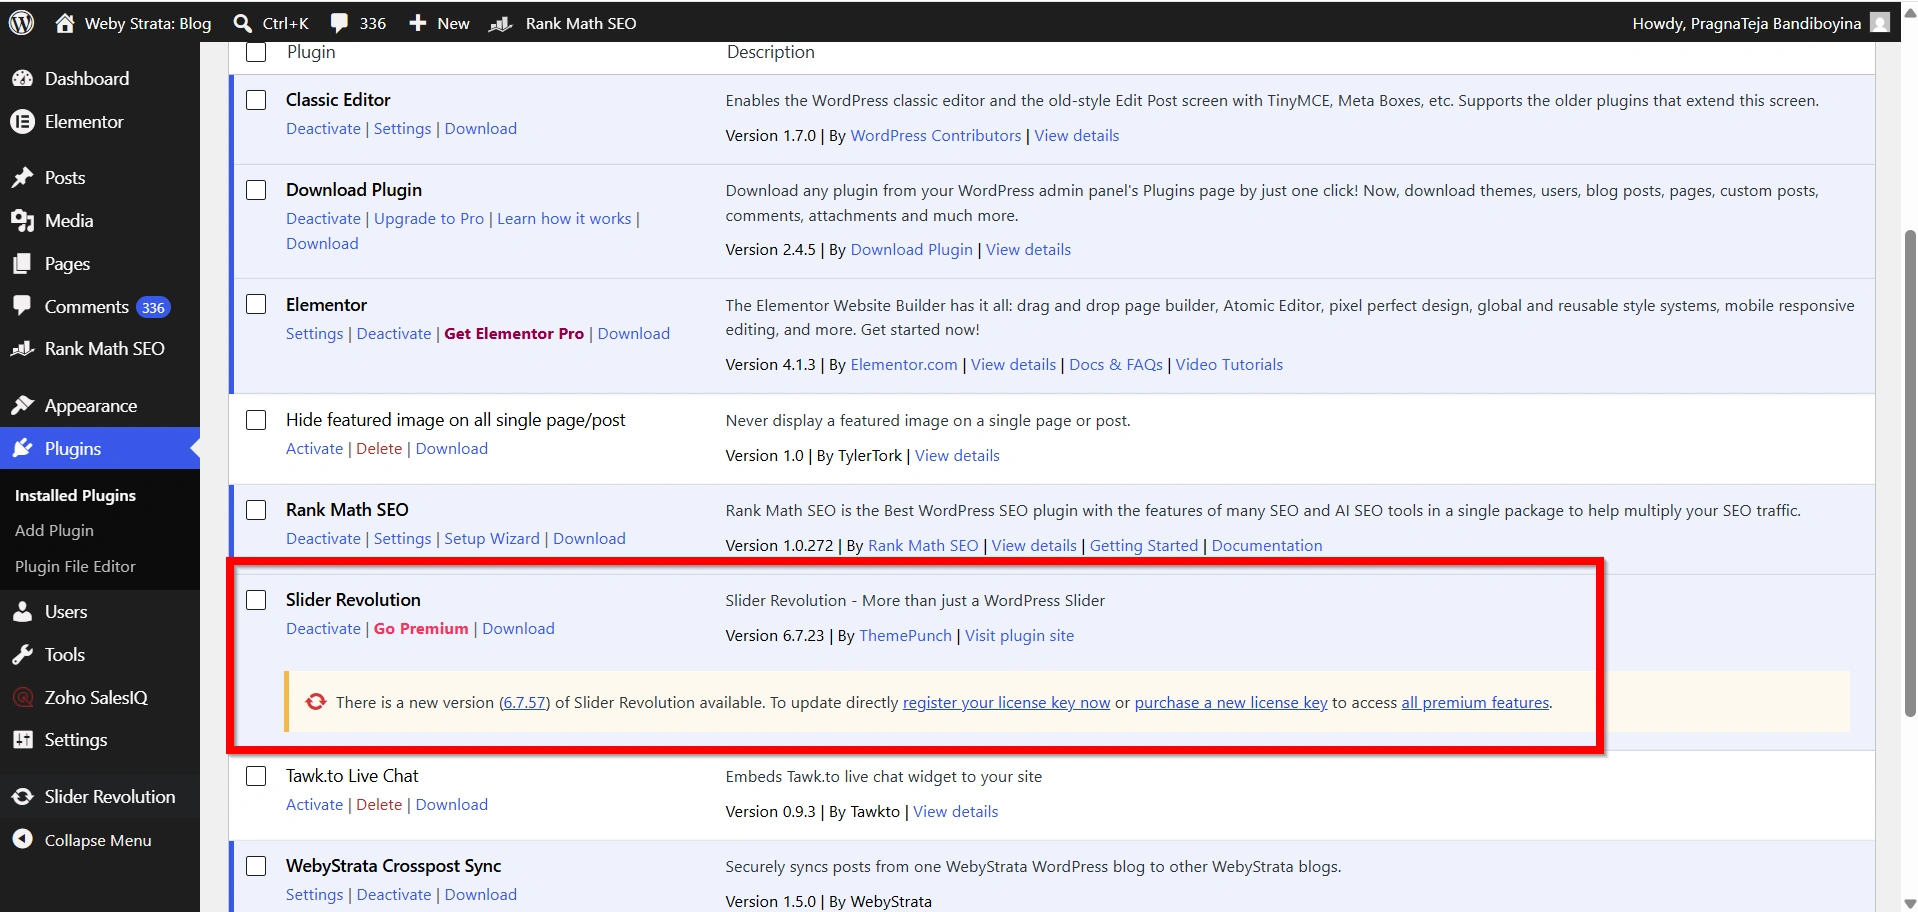
Step 3: Locate the Problematic Plugin
Review the list of installed plugins and identify the plugin that is causing the issue.
You may recognize the problematic plugin if:
- A specific feature has stopped working.
- Error messages reference the plugin.
- The issue began shortly after installing the plugin.
- Problems appeared after modifying plugin settings.
Take note of the plugin name before proceeding.
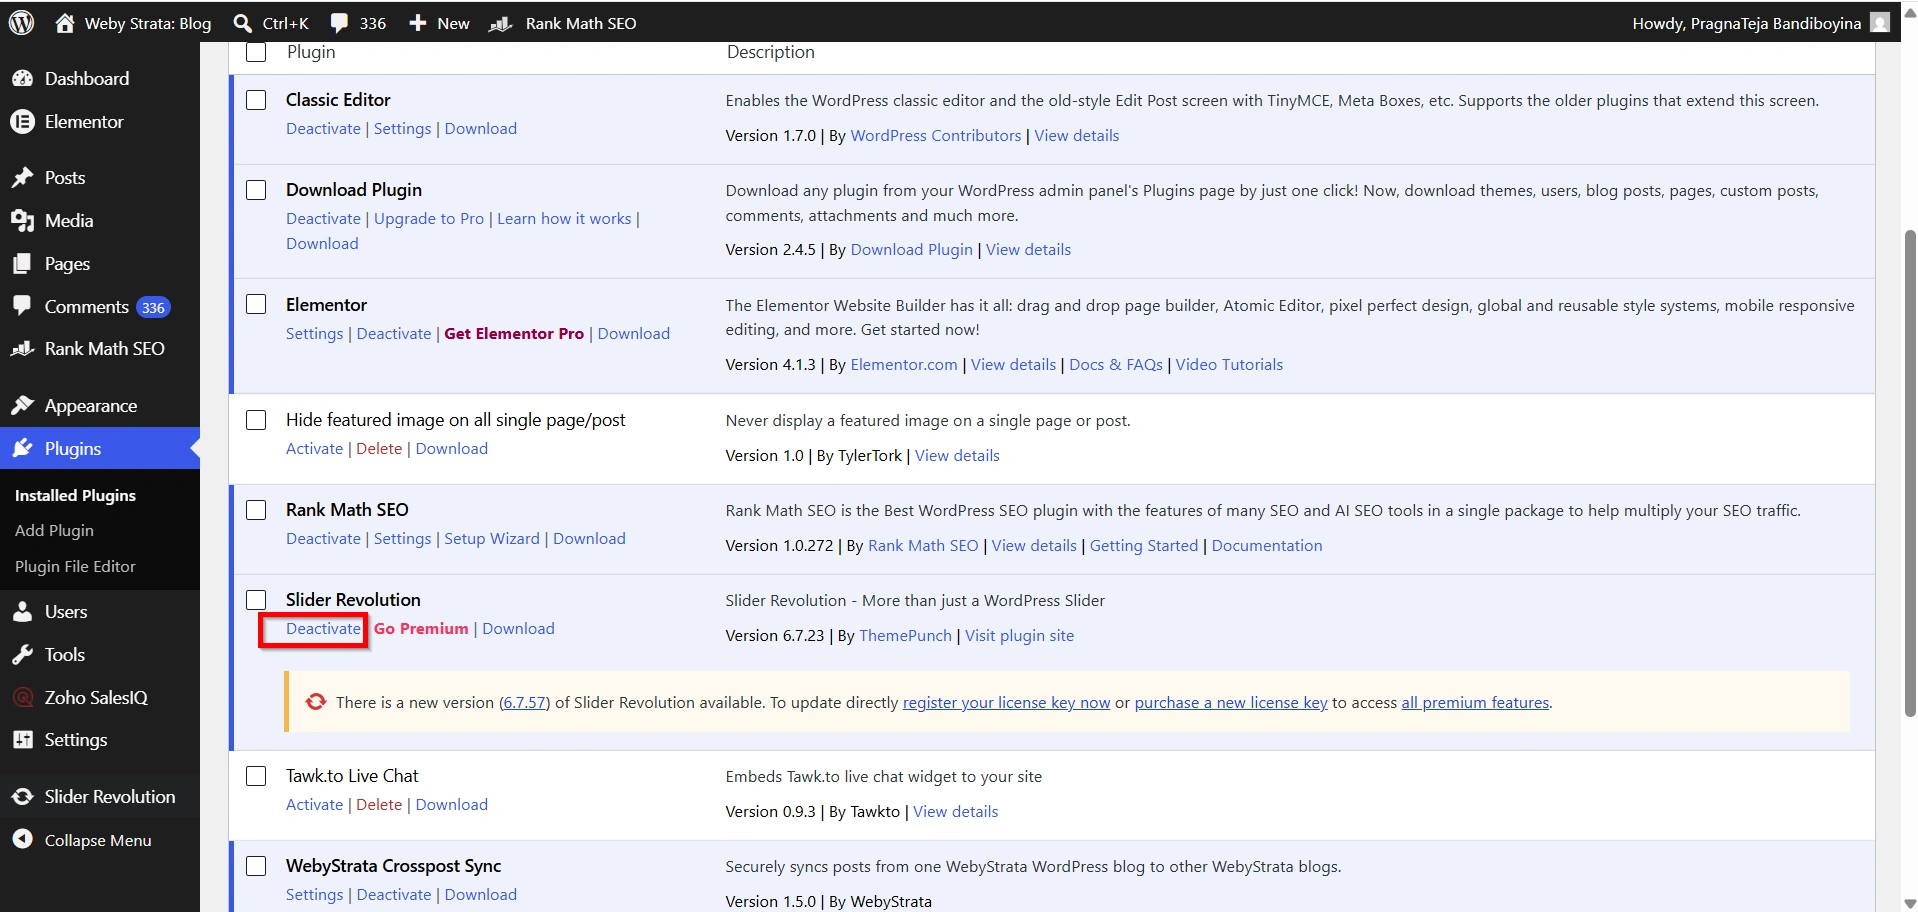
Step 4: Deactivate the Plugin
Under the plugin name, click the Deactivate option.
WordPress will disable the plugin immediately and refresh the page.
During this process:
- The plugin remains installed.
- Plugin files are not deleted.
- Website content remains unchanged.
- Most plugin settings are preserved.
Step 5: Wait a Few Seconds
Allow WordPress a few moments to fully process the deactivation.
This brief pause ensures that any active plugin processes are stopped correctly before reactivation.
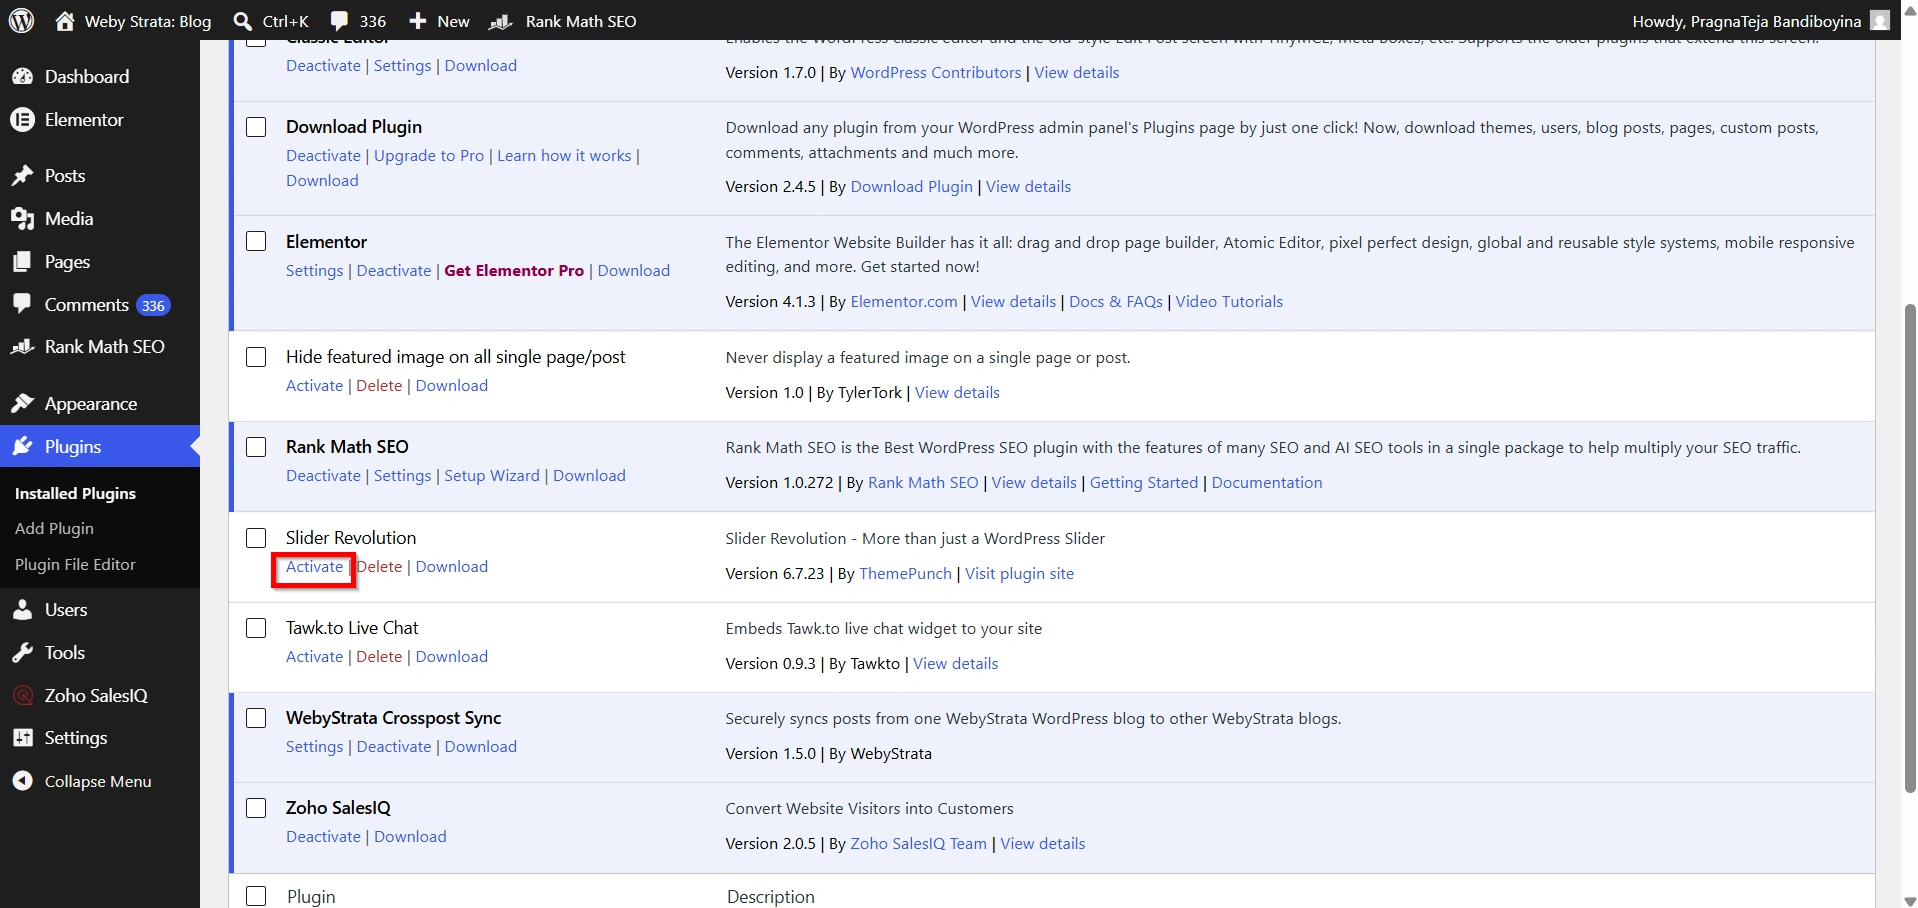
Step 6: Reactivate the Plugin
Once the plugin has been deactivated, click the Activate link that appears below the plugin name.
WordPress will reload the plugin and restore its functionality.
The plugin should now be active again and ready for use.
Step 7: Verify the Plugin Functionality
Visit the page, feature, or section of your website where the problem originally occurred.
Check whether:
- Error messages have disappeared.
- Features are functioning correctly.
- Website performance has improved.
- Plugin-generated content is displaying properly.
If everything works as expected, the issue may have been caused by a temporary plugin problem that has now been resolved.
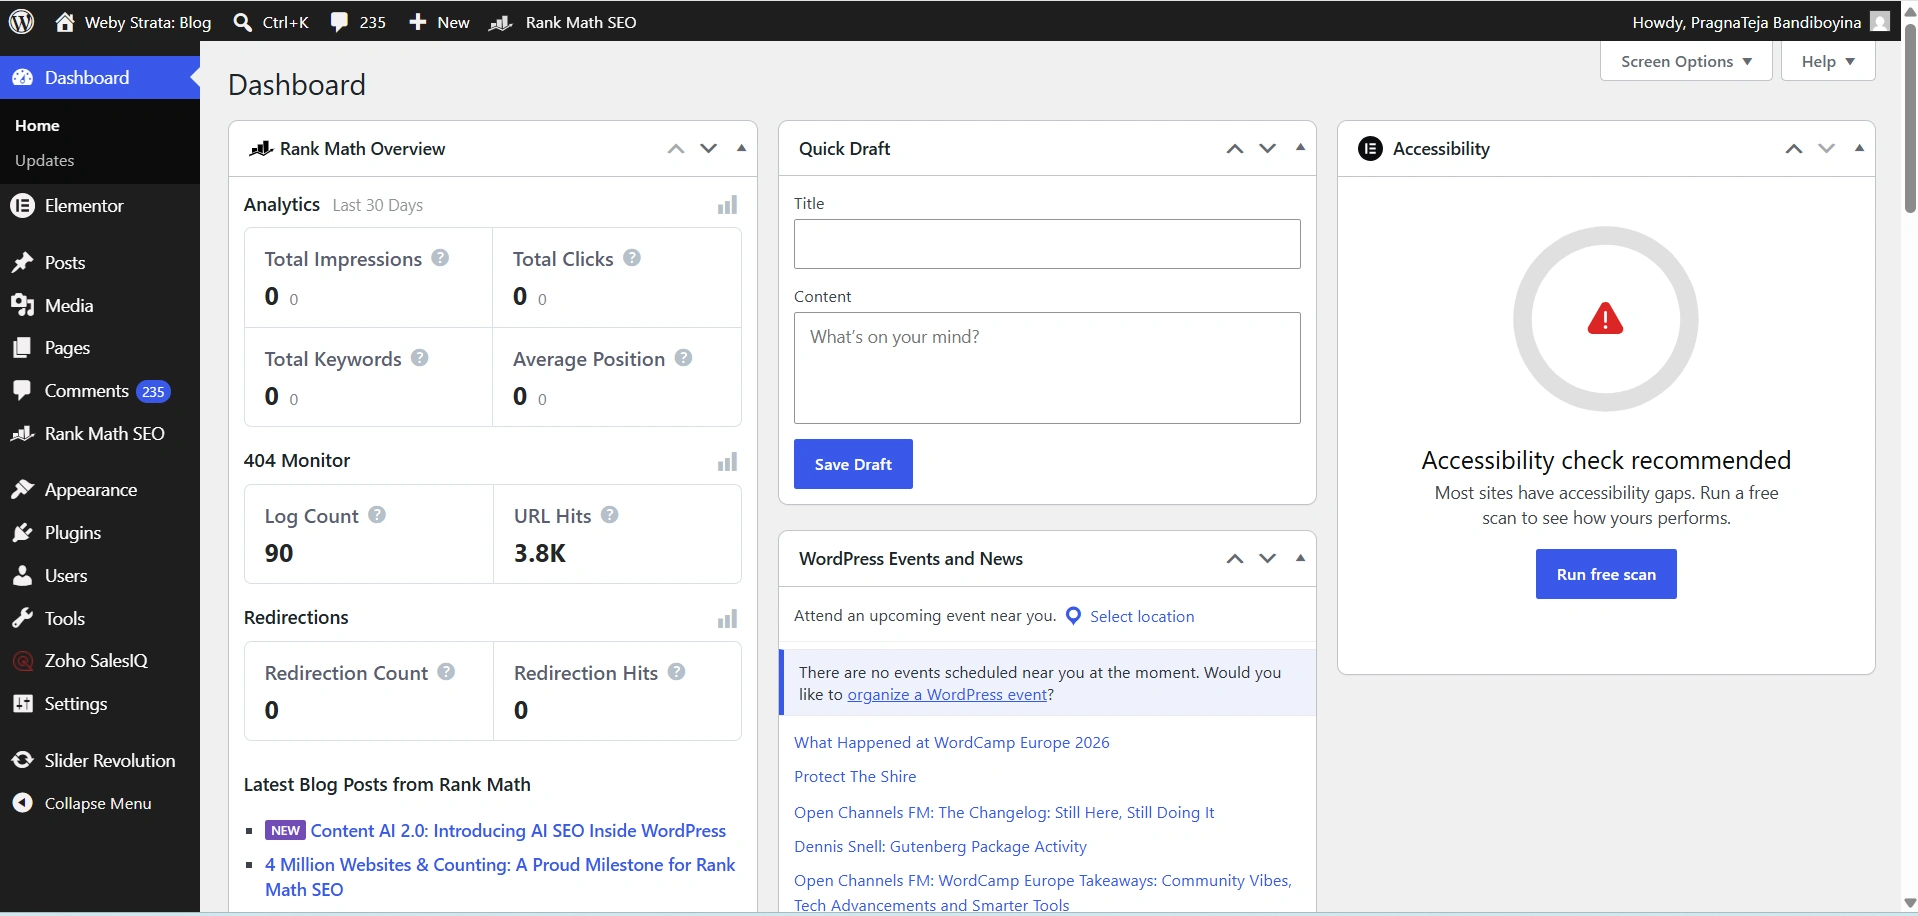
Screenshot: Website Functioning Normally
Benefits of Deactivating and Reactivating a Plugin
This troubleshooting method offers several advantages:
- Quick and Simple
- No Technical Knowledge Required
- Preserves Plugin Settings
- Resolves Temporary Errors
- Safe Troubleshooting Method
- Useful First Troubleshooting Step
Common Use Cases
You may want to deactivate and reactivate a plugin when:
- A plugin suddenly stops working.
- A widget or shortcode no longer displays correctly.
- Website functionality becomes unavailable.
- Plugin-generated forms stop loading.
- Features disappear after modifying plugin settings.
- Error messages appear without warning.
- You need a quick troubleshooting step before contacting support.
Conclusion
Plugin errors are a common part of managing a WordPress website, but they are often easy to resolve. One of the simplest and most effective methods is to deactivate and reactivate the affected plugin. This process refreshes the plugin’s functionality, clears temporary issues, and restores normal operation without requiring advanced technical skills.
If you’re looking for a fast and beginner-friendly way to Fix WordPress Plugin Errors, deactivating and reactivating the plugin should be your first troubleshooting step. In many cases, this straightforward solution is all that’s needed to get your website running smoothly again.
Originally published on WebyStrata.com Blog.
Related Articles